git see what changes need to be pulled
This browser is no longer supported.
Upgrade to Microsoft Edge to take reward of the latest features, security updates, and technical support.
Update code with fetch, merge, and pull
Azure DevOps Services | Azure DevOps Server 2020 | Azure DevOps Server 2019 | TFS 2018
Visual Studio 2019 | Visual Studio 2017 | Visual Studio 2015
When there are several contributors to a project, keep your local Git repo updated by downloading and integrating work that others uploaded to the project's remote repo. These Git commands update your local repo:
-
fetchdownloads any new commits that others uploaded to the remote repo. The remote-tracking branches in local repo cache are updated—local branches remain unchanged. -
mergeintegrates commits from one or more source branches into a target branch. -
rebaseintegrates commits from a source branch into a target branch, simply uses a dissimilar strategy tomerge. -
pullperforms afetchand so amergeorrebaseto integrate fetched commits into your electric current local branch.
Visual Studio uses a subset of those Git commands when you synchronize your local repo with a remote repo.
For an overview of the Git workflow, see Azure Repos Git tutorial.
This article provides procedures for the post-obit tasks:
- Download changes with fetch
- Update branches with merge or rebase
- Download changes and update branches with pull
Download changes with fetch
Git fetch downloads remote branch commits and referenced file objects that don't exist in your local repo and updates the remote-tracking branches in local repo cache. Remote-tracking branches are locally cached read-just copies of remote branches and aren't your local branches. Git fetch doesn't update your local branches. For case, if a remote repo designated by origin has a bugfix3 branch, Git fetch will update the remote-tracking branch named origin/bugfix3 and not your local bugfix3 co-operative. You can utilise remote-tracking branches to:
- Compare a remote-tracking branch with a local co-operative to review fetched changes.
- Merge a remote-tracking branch into a local co-operative.
- Create a new local co-operative from a remote-tracking co-operative.
- Visual Studio 2019
- Visual Studio 2017
- Git Command Line
Visual Studio 2019 version sixteen.8 and later versions provides a Git version command experience while maintaining the Team Explorer Git user interface. To utilize Team Explorer, uncheck Tools > Options > Preview Features > New Git user experience from the carte bar. You can use Git features from either interface interchangeably. Beneath, we provide a side-past-side comparison of how to perform a Git fetch.
- In the Git Changes window, choose Fetch. So select outgoing/incoming to open the Git Repository window.
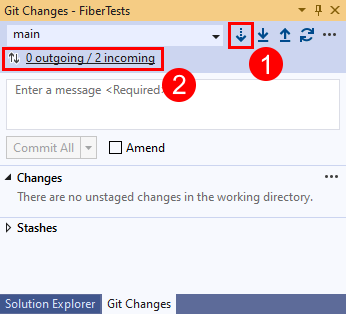
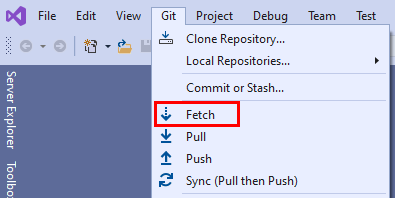
Y'all can also cull Fetch from the Git carte.
- In the Git Repository window, fetched commits announced in the Incoming section. Select a fetched commit to see the list of changed files in that commit. Select a changed file to see a unequal view of inverse content.

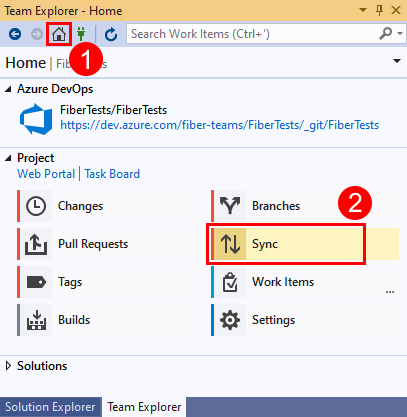
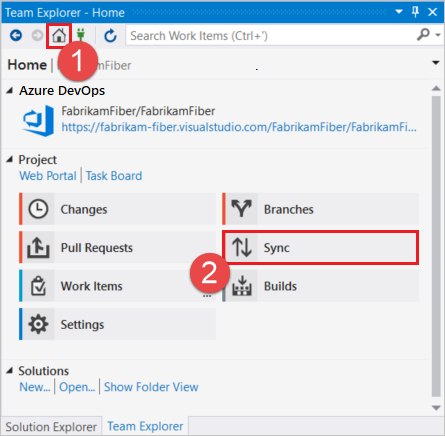
- In Team Explorer, select Home and then choose Sync to open the Synchronization view.
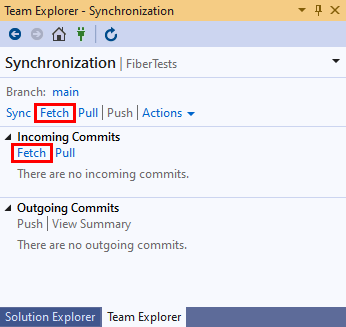
- In the Synchronization view, choose Fetch. Both Fetch buttons practise the same matter. When downloaded, fetched commits volition appear in the Incoming Commits section.
- In the Incoming Commits section, right-click a commit and and then choose View Commit Details to meet the inverse files.
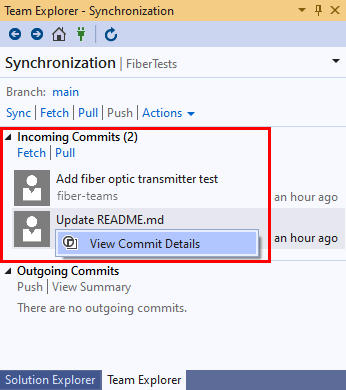
- In the Commit Details window, the changed files are listed in the Changes section.

Double-click a changed file to open a unequal view of changed content.

Tip
Fetch won't delete remote-tracking branches in your local repo cache that no longer have a remote counterpart. To configure Visual Studio to prune dried remote-tracking branches during a Fetch:
- Select Tools > Options > Source Control > Git Global Settings.
- Gear up the Clip remote branches during fetch option to
True.


Later a Git fetch, you can compare a local branch with its corresponding remote-tracking branch to meet what changed on the remote branch. If you lot decide to update your current local branch with fetched changes, you can perform a Git merge or rebase. Or, y'all can run Git pull, which combines a Git fetch with a Git merge or rebase. Both Git merge and rebase update a target branch by applying commits from a source co-operative onto it. Nevertheless, Git merge and Git rebase utilise different strategies. For more information, see Update branches with merge or rebase and When to rebase vs. merge.
Update branches with merge or rebase
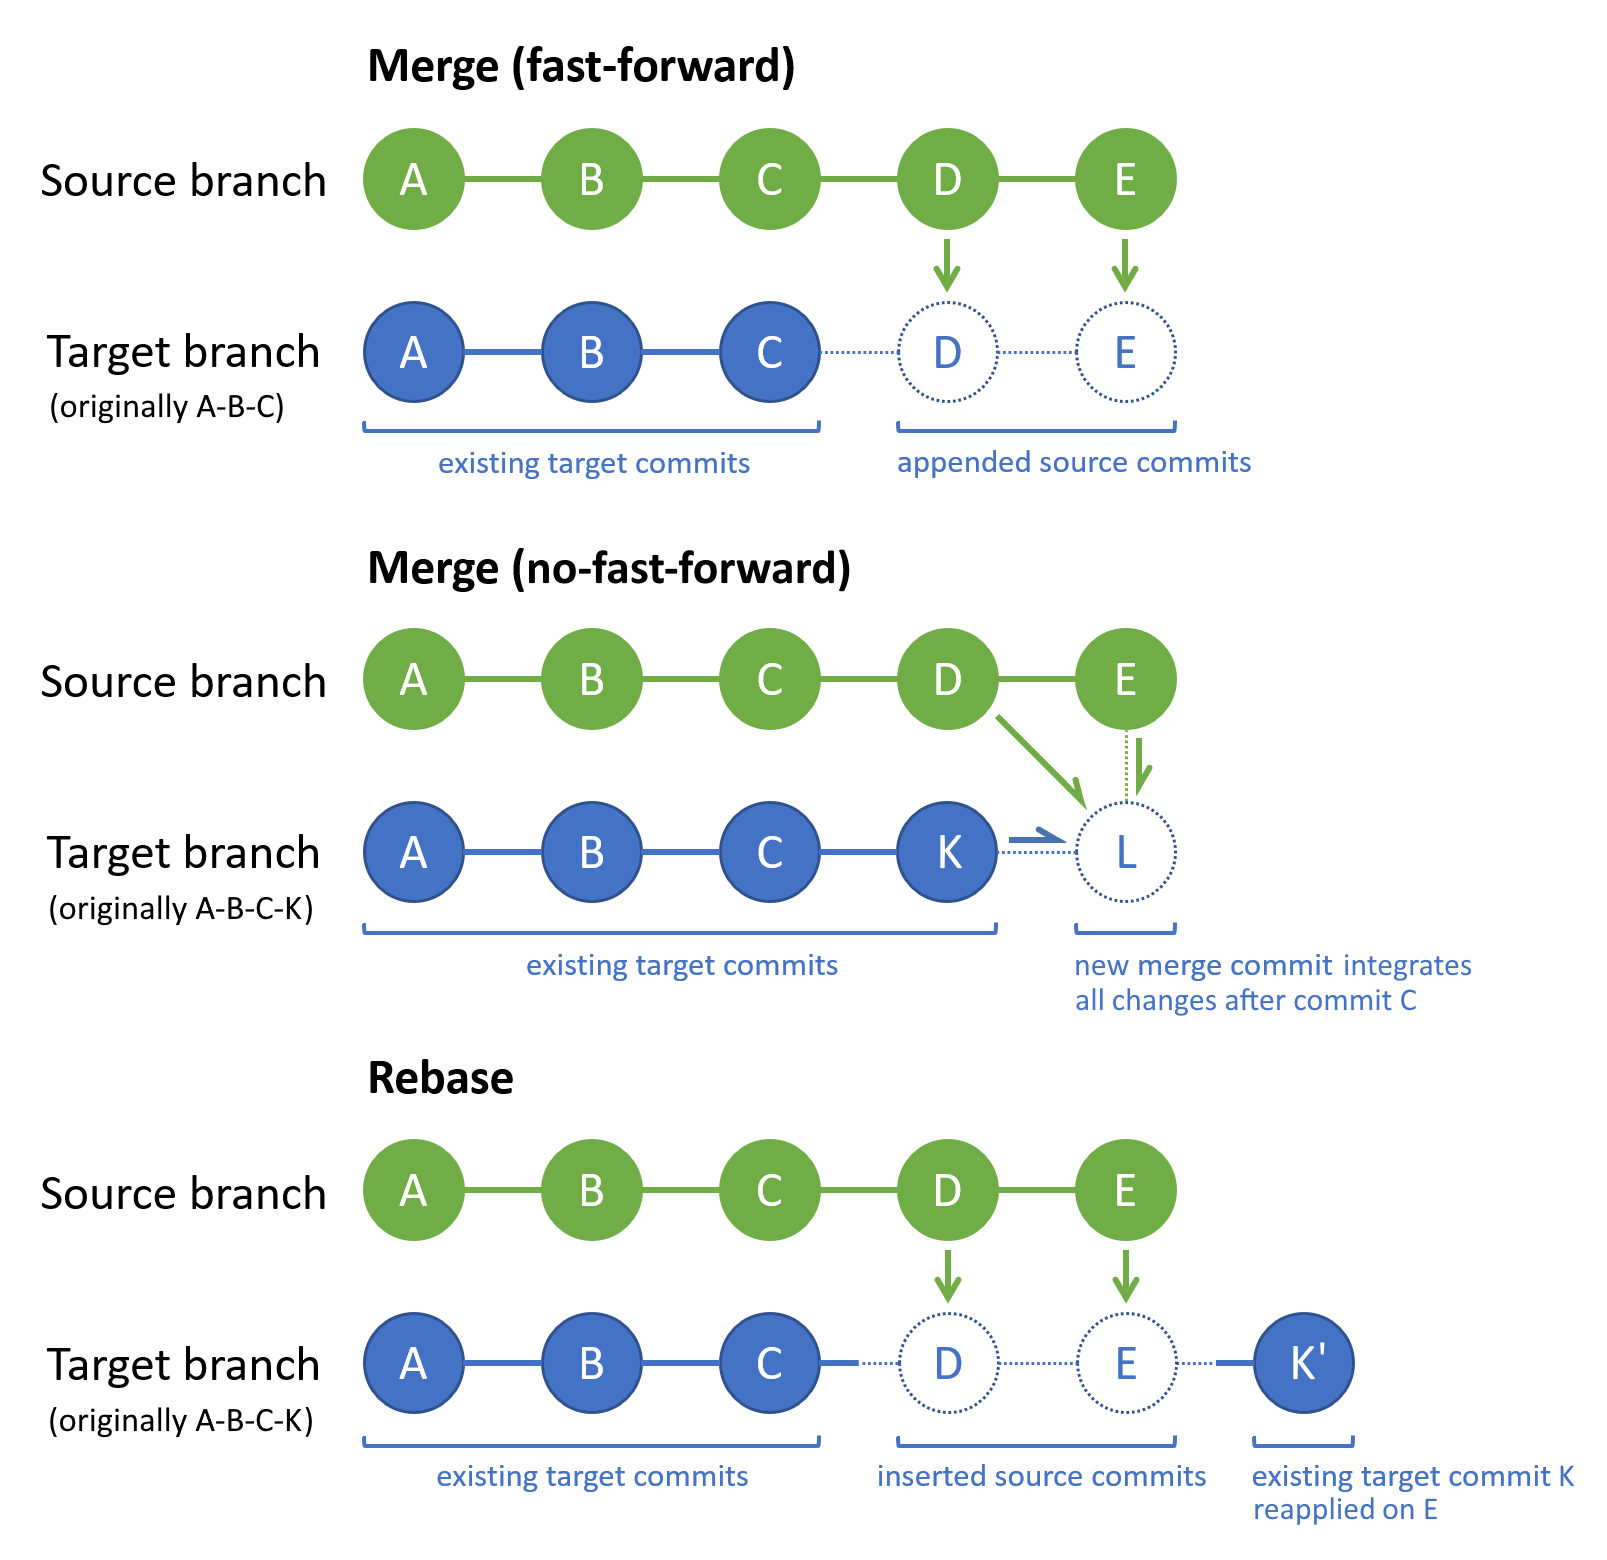
Git merge or Git rebase integrates commits from a source branch into your current local branch (the target branch). Git merge performs either a fast-forward or a no-fast-forward merge. The no-fast-forward merge is besides known every bit a three-way merge or true merge. Git rebase is another type of merge. These merge types are shown in the post-obit diagram.
Git merge and Git rebase are extensively used in the Git workflow. When working on a local feature or bugfix branch, information technology'due south common practice to:
- Keep your local
mainbranch current with its remote analogue by periodically pulling to fetch remote commits then merge or rebase. - Integrate local
principalco-operative updates into your local characteristic co-operative using a merge or rebase. - Frequently support your piece of work on the local characteristic branch by pushing it to the corresponding remote branch.
- On feature completion, create a pull request to merge your remote feature branch into the remote
mainbranch.
This approach helps you:
- Stay aware of recent work past others that might touch your piece of work.
- Promptly resolve any conflicts betwixt your work and that of others.
- Apply your new feature on top of up-to-engagement project content.
- Get a pull asking review of your piece of work.
Merge
For Git merge, if the tip of the target branch exists within the source branch, the default merge type will be a fast-frontwards merge. Otherwise, the default merge type volition exist a no-fast-forward merge.
A fast-forward Git merge tin never have a merge disharmonize because Git won't utilize a fast-forward merge if the tip of the target branch has diverged from the source branch. Past default, Git uses a fast-forward merge whenever possible. For example, for a local co-operative that you don't work in and simply update it from a remote branch, Git will apply a fast-frontward merge.
A no-fast-forward Git merge generates a new target branch "merge commit" that integrates source branch changes with target branch changes. The applicative changes are those made after the last commit that'due south common to both branches. In the preceding diagram, commit C is the last common commit in both branches. If any source co-operative change conflicts with any target branch change, so Git will prompt you to resolve the merge conflict. The merge commit (X) contains the integrated source branch and target branch changes. The source and target branch tips (Yard and Eastward) are the parents of the merge commit. In your branch's commit history, a merge commit is a useful marker for a merge operation, and clearly shows which branches were merged.
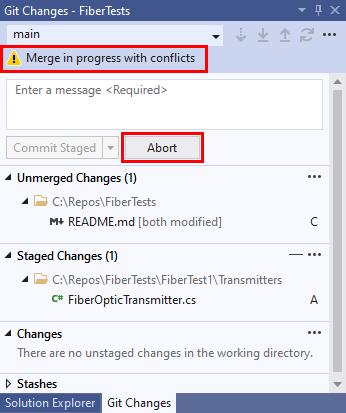
The Git merge command only modifies the target branch—the source co-operative remains unchanged. When you run across one or more than merge conflicts, yous must resolve them to complete the merge. Or, you tin can abolish the merge operation and return the target co-operative to its prior state.
For more information on Git merge options and strategies, see the Git reference manual and Git merge strategies.
Tip
If the source branch is a remote-tracking branch, ensure that co-operative is up-to-date by running a Git fetch before the merge.
- Visual Studio 2019
- Visual Studio 2017
- Git Control Line
Visual Studio 2019 version sixteen.8 and after versions provides a Git version control feel while maintaining the Team Explorer Git user interface. To use Squad Explorer, uncheck Tools > Options > Preview Features > New Git user experience from the menu bar. Y'all can use Git features from either interface interchangeably. Below, we provide a side-past-side comparison of how to perform a Git merge.
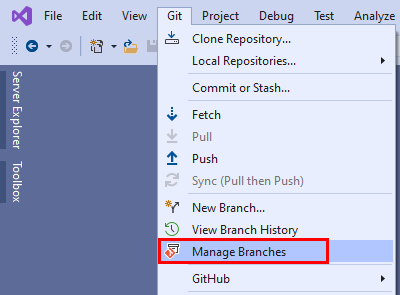
- Choose Git > Manage Branches from the menu bar to open up the Git Repository window.
- In the Git Repository window, correct-click the target branch and select Checkout.
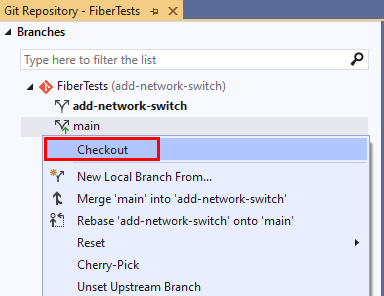
- Right-click the source co-operative, and select Merge <source-branch> into <target-branch>.
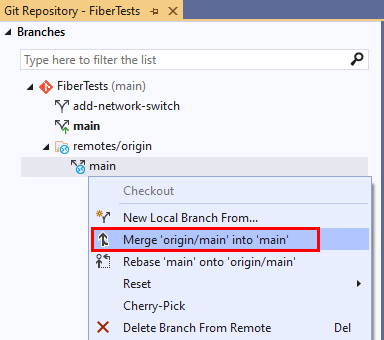
- Visual Studio volition display a confirmation message after a successful merge.

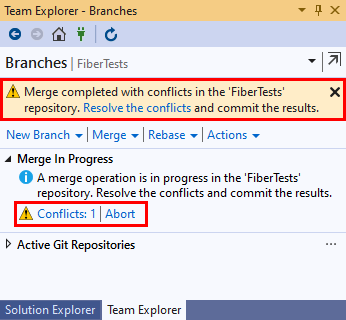
If the merge is halted due to merge conflicts, Visual Studio will notify y'all. So, you tin can either resolve the conflicts, or cancel the merge and render to the pre-merge land.
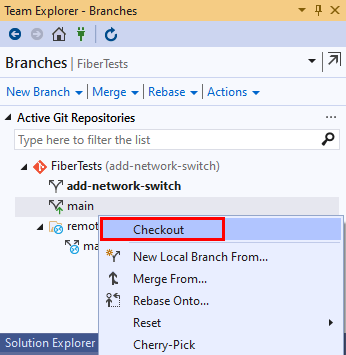
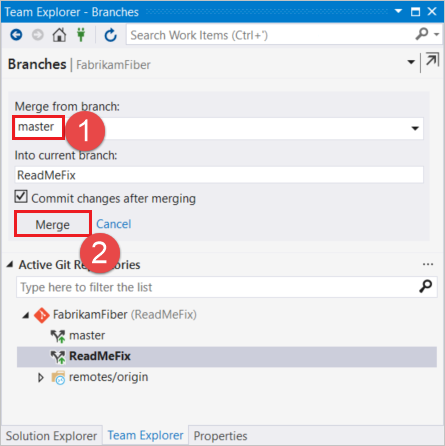
- In Team Explorer, select Home and cull Branches.
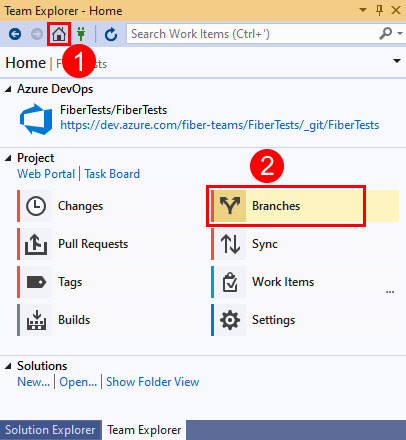
- In the Branches view, right-click the target branch and select Checkout.
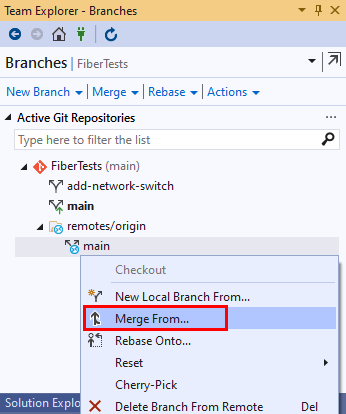
- Right-click the source co-operative, and select Merge From.
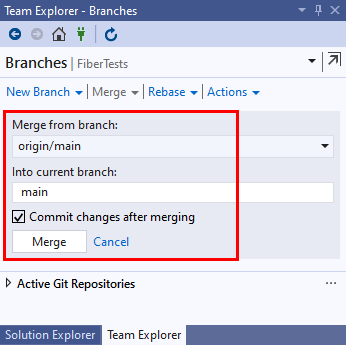
- Verify the merge options and then click Merge.
- Visual Studio will display a confirmation message after a successful merge.
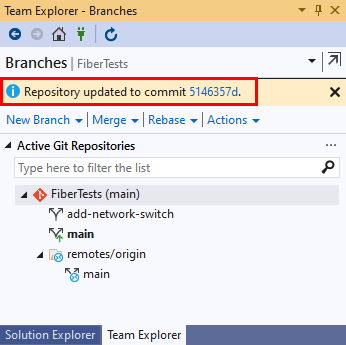
If at that place are conflicts during the merge, Visual Studio will notify you. And then, you can either resolve the conflicts, or cancel the merge and render to the pre-merge state.


Rebase
The Git rebase control resequences the commit history of the target branch then that it contains all source branch commits, followed past the target branch commits that occur after the final mutual commit in both branches. If whatever source co-operative change conflicts with any target branch change, then Git volition prompt you lot to resolve the merge conflict. Git rebase doesn't create a merge commit. If y'all're the but person working on your characteristic or bugfix branch, consider using Git rebase to integrate new main branch commits into information technology. Otherwise, utilise Git merge.
The Git rebase command only modifies the target co-operative—the source branch remains unchanged. When you encounter one or more than merge conflicts, yous must resolve them to consummate the rebase. Or, y'all can cancel the rebase operation and return the target branch to its prior state. For more information on Git rebase and when to employ it, run into Apply changes with rebase and Rebase vs merge.
Tip
If the source branch is a remote-tracking branch, ensure that co-operative is up-to-date by running a Git fetch before the rebase.
- Visual Studio 2019
- Visual Studio 2017
- Git Command Line
Visual Studio 2019 version 16.8 and subsequently versions provides a Git version control experience while maintaining the Team Explorer Git user interface. To use Squad Explorer, uncheck Tools > Options > Preview Features > New Git user feel from the menu bar. You can use Git features from either interface interchangeably. Below, we provide a side-by-side comparison of how to perform a Git rebase.
- Choose Git > Manage Branches to open the Git Repository window.
- In the Git Repository window, correct-click the target co-operative and select Checkout.
- Right-click the source branch, and select Rebase <target-branch> onto <source-branch>.
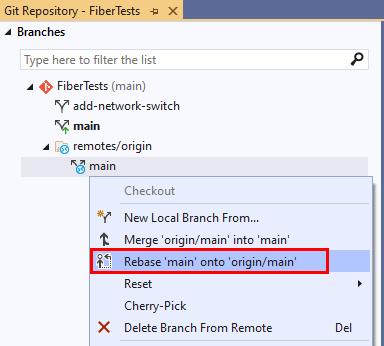
- Visual Studio will display a confirmation message after a successful rebase.
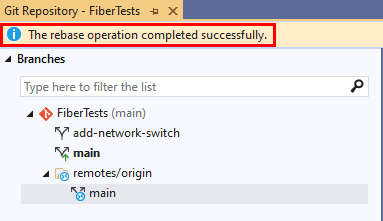
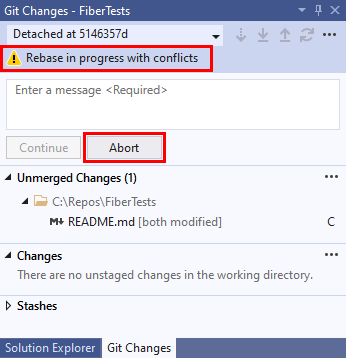
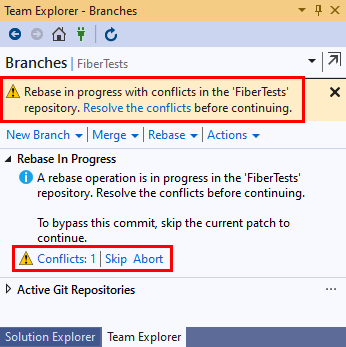
If the rebase is halted due to rebase conflicts, Visual Studio will notify you. And so, you can either resolve the conflicts, or cancel the rebase and return to the pre-rebase state.
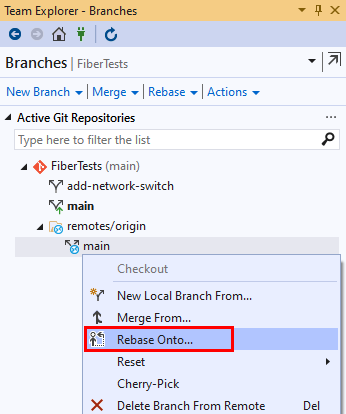
- In Team Explorer, select Home and choose Branches.
- In the Branches view, right-click the target branch and select Checkout.
- Right-click the source branch, and select Rebase Onto.
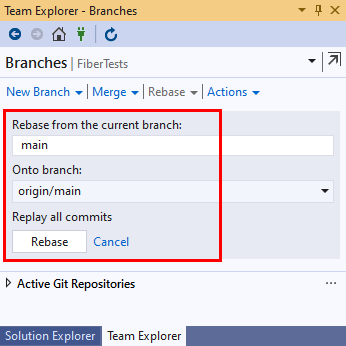
- Verify the rebase options and then click Rebase.
- Visual Studio will display a confirmation message after a successful rebase.
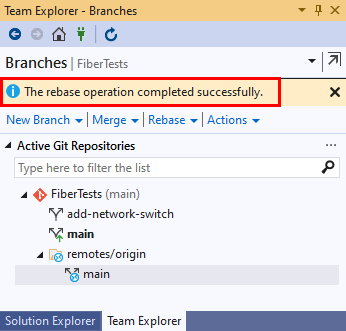
If there are conflicts during the rebase, Visual Studio will notify you. And so, you tin can either resolve the conflicts, or cancel the rebase and render to the pre-rebase land.
Download changes and update branches with pull
By default, Git pull combines a Git fetch and a Git merge to update your current local co-operative from its remote analogue. Optionally, Git pull can perform a Git rebase instead of a Git merge.
Unlike Git fetch, Git pull will update your current local branch immediately later downloading new commits from the remote repo. Apply Git pull when you know you want to update your current local branch right afterwards a Git fetch.
- Visual Studio 2019
- Visual Studio 2017
- Git Command Line
Visual Studio 2019 version 16.8 and later versions provides a Git version command experience while maintaining the Team Explorer Git user interface. To use Team Explorer, uncheck Tools > Options > Preview Features > New Git user experience from the carte du jour bar. You can utilize Git features from either interface interchangeably. Beneath, we provide a side-by-side comparing of how to perform a Git pull.
Tip
To configure Visual Studio to rebase instead of merge when you Pull:
- From the Git bill of fare, got to Tools > Options > Source Control > Git Global Settings.
- Prepare the Rebase local branch when pulling selection to
Truthful.
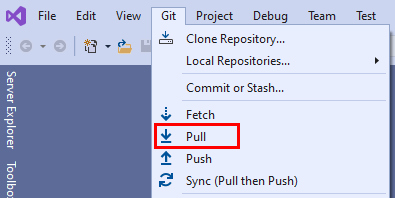
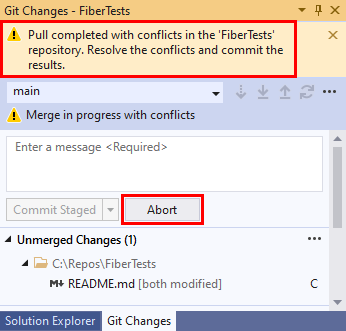
- In the Git Changes window, choose Pull.
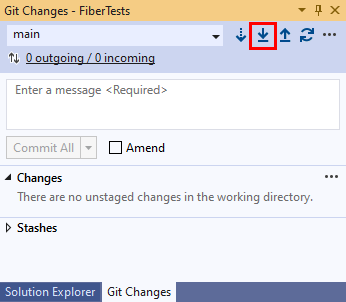
You can too choose Pull from the Git bill of fare.
- A confirmation message displays when the pull operation completes.
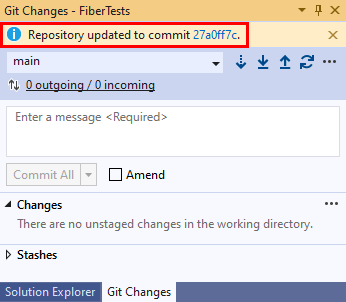
If there are conflicts during the merge portion of the pull operation, Visual Studio will notify y'all. Then, you can either resolve the conflicts, or cancel the merge and render to the pre-merge land.
- In Team Explorer, select Home and choose Sync to open up the Synchronization view.
- In the Synchronization view, choose Pull. Both Pull buttons do the same matter.

- Visual Studio will display a confirmation message when the pull operation completes.
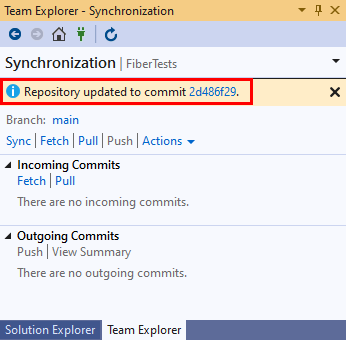
If there are conflicts during the merge portion of the pull operation, Visual Studio will notify yous. Then, you can either resolve the conflicts, or cancel the merge and return to the pre-merge state.


Next steps
Related articles
- New to Git repos? Learn more than
Feedback
Submit and view feedback for
Source: https://docs.microsoft.com/en-us/azure/devops/repos/git/pulling
Post a Comment for "git see what changes need to be pulled"